Friday, January 30, 2009

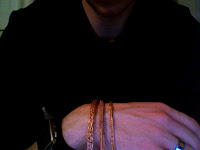
This is a finished length of the three nails knit. You can see the difference between this knit and viking knit. It is much easier to make wide ropes from this technique, however they are more hollow and see through, which does present the opportunity for inserting beads.


Tuesday, January 27, 2009

Alternate wire knitting

I've been working on another form of knitting wire.

It is very similar to how industrial knitting is done. A row of loops is pulled through the row beneath it. It goes a bit quicker than the viking knitting, since you don't have to thread the end of the wire through each loop.

The trade off is that the wire has to be formed prior to looping it. The wire needs to be wrapped around three nails on a board, over and over.


You can see from this starter piece that it looks pretty different from viking knitting. I will take some more pics of a completed length for comparison when I've got it done.

Also,
I made another herring bone weave piece to practice and to better show its construction.

Heres a shot from the side

Heres one from the back and one from the front.

Supplies

The viking knit and other copper projects have been using up my available phone wire copper pretty quickly so today went ahead and stripped some more. Now I have about 100 feet of it ready for use in other projects. On a related note I have another viking knit commission that requires a little bit different direction. I must do it in silver, so I had to order the wire. I'm not sure when it will arrive but as soon as I get the thing started I will post some pics.

Here's the wire I stripped today.


Monday, January 26, 2009


This technique is called herring bone weaving. I looked at a few pieces and tried to replicate it. I need some nylon jawed pliers to smooth out the wire, but the weave I've got down.

Sunday, January 25, 2009

Viking knit commission

Here are some pictures of a viking knit necklace I was commissioned to make. It measures about 17 inches long and 1/4 inch wide. I made the end caps and the S clasp from wider electrical wire and the viking chain fro phone wire. I had to flatten the S clasp with pliers since I don't have a hammering block yet.


Wednesday, January 21, 2009

Even more Crafty Updates

On the advise of a friendly friend I am going to start posting works in progress or bits I've been tinkering with along with the mostly finished pieces.

To that end here are a few things I've been playing with.
This is actually a hunk of aluminum I pulled from the bottom of my Dad's woodstove in his garage. We were seeing if we could melt glass in a pot inside the fire and it turns out the pot we thought was steel was aluminum. Consequently the pot melted and the glass did not. I pulled several nuggets of aluminum from the bottom of the stove and polished them up. I played around with some wire wrapping and wrapped this one.


This is just a spiral I hammered out and thought would make a neat bookmark.


This is a wire wrapping project that I couldn't figure out how to finish. I didn't know if I wanted to make it a necklace or make another for earrings.


Tuesday, January 20, 2009

More Copper Crafts

I'm pretty sure you can make any of these pictures bigger, sorry about the quality I took them with the laptop's camera.

This first bracelet it simply a chainmail double spiral. I made it using alternating pairs of 12 gauge copper wire from old electrical wire and some plain galvanized steel. It looks very rope-like and has a great heft to it.


This bracelet I made using a technique I just learned called Viking Knit. This process takes considerably longer than chainmail, but gives yields a very lovely, almost serpentine, rope. I'm not sure if I'm going to try to sell it or not so I left one end unfinished and put a wire cap on the other. I used phone wire which is around 26 gauge, for the majority of it, then some electrical wire for the end cap.


Let me know what you think.